Sunday, January 13, 2008


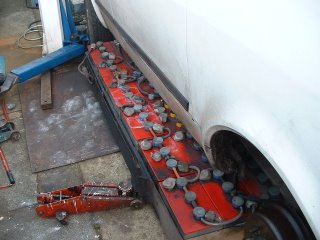
The last time I removed the battery pack there was a split in a weld at the rear of the battery pack. I decided to quickly stick weld it up but due to the unlucky position of the insulation there was a gap and one cell got a hole in it. I had to remove the whole pack then cut the battery out and weld the battery case up with a glue gun (my favorite tool).
When working on the battery pack I really must remember to keep the vent pipes on the vacuum pump otherwise a Hydrogen explosion is going to happen.
The batteries are constantly producing Hydrogen and Oxygen gas, especially after a water refill. This is because when the water level is raised the acid connects two regions of lead in the battery in different states of charge. (the top of the cell is at lower voltage than the bottom) This produces current from top to bottom of the plates and makes a lot of gas. I discovered this last time when I switched off the vacuum pump while waving a blowtorch around. It ignited the gas and blasted the tops off 18 cells! I had to use the glue gun for about 3 hours that evening to get the van running for the next morning.
In fact I am looking for a vacuum pump that can run continuously to clear the gas.
It has to be able to cope with acid vapour.This video is of an early method of filling the batteries with demin water. I have switched to an Edwards EDM12 with a vacuum regulator.


In between servicing the battery pack every 3 months driving the van is very enjoyable.
The main problem is time. I use the van every week day for commuting to work so the servicing has to be completed in a weekend. This is not easy because you normally find problems when the battery pack is removed. Whatever I discover I have to deal with in a few hours. This is much harder in winter because of the dark short days cold and rain.
Getting the whole battery pack out has only been possible since summer 2007 because I was designing a rail system to carry the 1000kg of battery. What I came up with I am quite pleased with because it allows easy re alignment with the three mountings. And was cheap to make.
This is the usual procedure.
0)Remove the rear wheel
1)Disconnect the battery wires and vent pipes
2)Position the U rails 1m apart parallel under the battery.
3)Using 4 trolley jacks raise the battery
4)Remove the holding pins
5)Lower the battery onto the rails
6)Slowly pull the battery out with a pulley and rope
7)Connect the vacuum pump to one vent hose
8)Put the other vent hose in demin water barrel
9)Allow 18 batteries (1/2 pack) to fill until water flows into the glass jar.
10)Fill the other 18 batteries in the same way.
11)Clean the battery tops of dirt oil mud and acid
12)Fix any problems found
13)Push the battery back under the van using your foot
14)Using the jacks raise the battery
15)Refit the locating pins
16)Remove the jacks and rail system
17)Reconnect the battery cables and hoses
18)Do a test run round the block
Saturday, January 27, 2007
 27 Jan 2007 At Christmas the van Broke down and a puff of steam came out of the battery vent hose!
The AA man offered to replace the battery but I had to explain it was 216V and weighed 1000kg! Ah he said.
After careful searching I decided to buy three Enersys 200Ah 6V monoblocks. Model 6TP200,
After several days struggling with inadequate lifting gear, I managed to remove the defective 6V unit and connect the new battery. The new battery will not fit in the old space so it was mounted via cables in the door step. This is useful however because it allows me to monitor the new battery and also try out other battery types for endurance. The defect in the old battery seems to be a short between positive and negative plates.
Tuesday, December 27, 2005
Tuesday, December 13, 2005
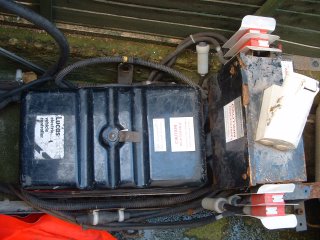
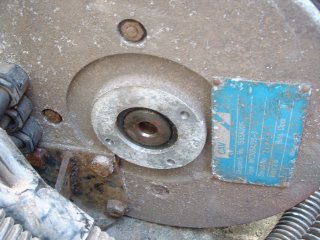
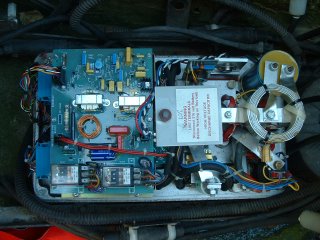 Hello I thought you should see some of the bits that make the van go. The photos below show the traction motor and 2:1 chain reduction gear. The motor bearing and the speed controller.
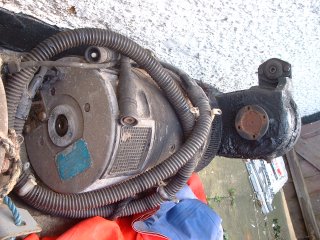
The weather lately has been very cold and it has had a negative effect on range, so much so that a couple of weeks ago the battery went completely flat on the journey home and I had to pull over for three minutes to let the batteries recover before limping the last mile home at about 5 MPH.
The solution I have discovered is to recharge the batteries every day even if the van is not used.
Every morning before setting off I suck out the Hydrogen gas with a Hoover to prevent the gas evolved during charging from igniting from sparks while traveling.
There is an ominous thud now after heavy breaking when the van comes to rest. I hope its not the motor getting loose on its mountings. The mountings get a real hammering because the motor is used for breaking and acceleration. 13-12-2005
Subscribe to:
Comments (Atom)

